How to Lay Porcelain Slabs
Whether you’re a DIY enthusiast or a contractor tasked with laying porcelain paving for the first time, we’ve got you covered. In this guide, we’ll walk you through the process of how to lay porcelain slabs step by step. This will help you to avoid common pitfalls and achieve great results, even if you’re new to outdoor porcelain tiles. From digging out the base to priming the slabs and creating a sturdy mortar bed, here’s everything you need to know. We’ll also provide tips for cutting porcelain slabs and a simple method for jointing your new patio, so stay tuned.
Materials and tools checklist
Tools:
- Tape Measure & Set Square
- Line Marking Paint & Wooden Plank
- Shovel or Mini Excavator
- String Line & Wooden Pegs
- Trowel & Pointing Iron
- Rubber Mallet
- Wheelbarrow or Cement Mixer
- Spirit Level (Long Length)
- Wacker Plate Compactor
- Water Cooled Bench Saw/ Petrol Wet Saw with Diamond Disc Cutter (if cuts are required)
Materials:
- MOT Type 1 (Sub-base)
- Mixed Building Sand
- Cement
- Porcelain paving slabs
- SBR Bonding Agent
- Slurry Primer
- Joint-It Epoxy Grout System
Prepping the foundation for your paving
Mapping out the perimeter as a guide
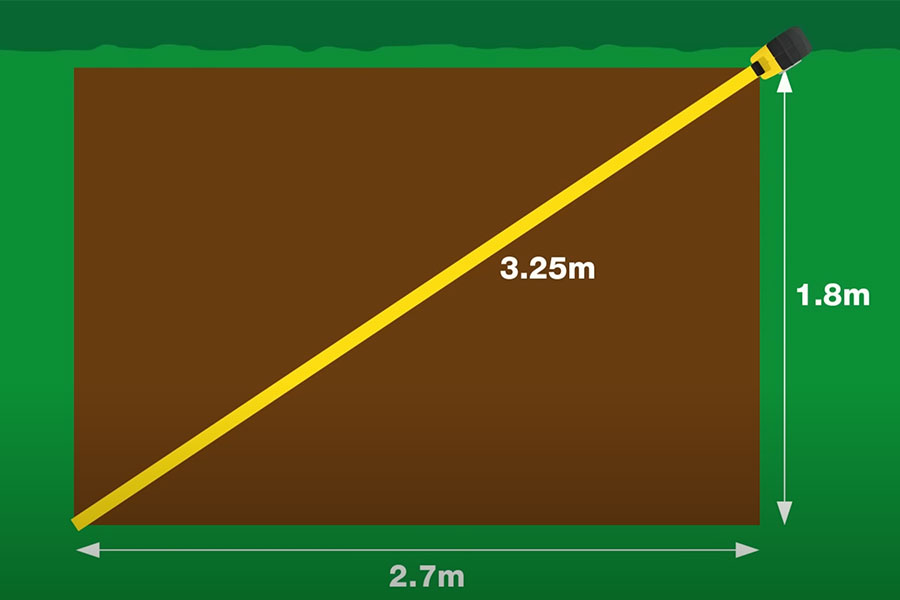
Image courtesy of Pavestone
Before starting to dig out your patio’s base, you’ll first need to mark out where it’s going to go. To do this, take some lining marking paint and a set square, and plot out the first corner. Once that’s in place, use a tape measure and set square to locate the perfect spot for the opposite second corner. Mark with paint, then using a spare plank of wood as a ruler, connect the corners with a line of paint. This will create the first part of the perimeter boundary, then all you need to do is repeat until completed.
When finished, the next step is to calculate the paving’s area in square metres – length x width. You’ll need to know this when it comes to ordering the right amount of slab packs which are usually sold in m2. Whatever figure you reach, it’s worth adding on 10% more to cover any breakages. That way, you won’t have to worry about sourcing more pavers in the event of an accident. Buying plenty of porcelain slabs from one batch also helps with colour consistency.
With that in mind, remember to check the packaging once your slabs have been delivered. As well as being the same colour, each pack will ideally be from the same batch for a more consistent finish. The reason for this is that the surface pattern and colour can vary between batches. You can then double check the finish while dry laying your outdoor porcelain tiles to determine the best layout. This will save you time when laying and help you identify whether cuts are needed to account for garden obstacles. Read our top tips for cutting porcelain below.
Digging the base and creating a fall for drainage
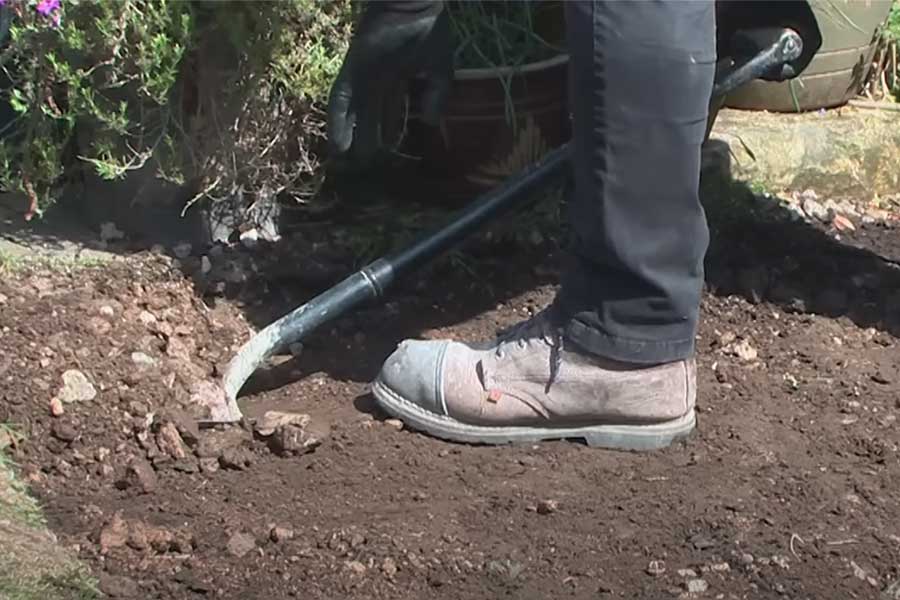
Image courtesy of Pavestone
Laying porcelain slabs and don’t already have a suitable subbase in place from an old patio? Then you’ll need to create a foundation, digging down until you reach firm ground suitable for building on. That means excavating to a depth of at least 170-175mm. This will account for a 100mm aggregate subbase, a 50mm thick mortar bed and the paving slabs themselves.
In addition, you’ll need to consider drainage. For example, if the patio butts up to a building, the finished height must be 150mm below the damp proof course. Alternatively, you’ll need to incorporate a kerb and gravel channel between the slabs and the wall to collect water runoff. You’ll also need to create a subtle fall – aka a slope – in the patio itself. This is especially vital when it comes to porcelain as its density and low-porosity prevents water passing through.
With that in mind, your patio should slope away from your home to prevent pooling and allow rainwater to drain. The recommended fall ratio for porcelain paving is 60:1 drop per metre – slightly sleeper than for stone slabs. This means that for every 60cm in length, there should be a 1cm drop in height. To calculate the fall, divide the length of the paved area in mm by 60.
Once calculated, drive wooden pegs into the ground at two points on the higher end of the patio to mark its finished height. Two more pegs should then be placed at the far end and lowered to reflect the desired gradient. Then connect each peg with string to create a sloping guideline that reflects the intended surface level. You can then follow this as you work.
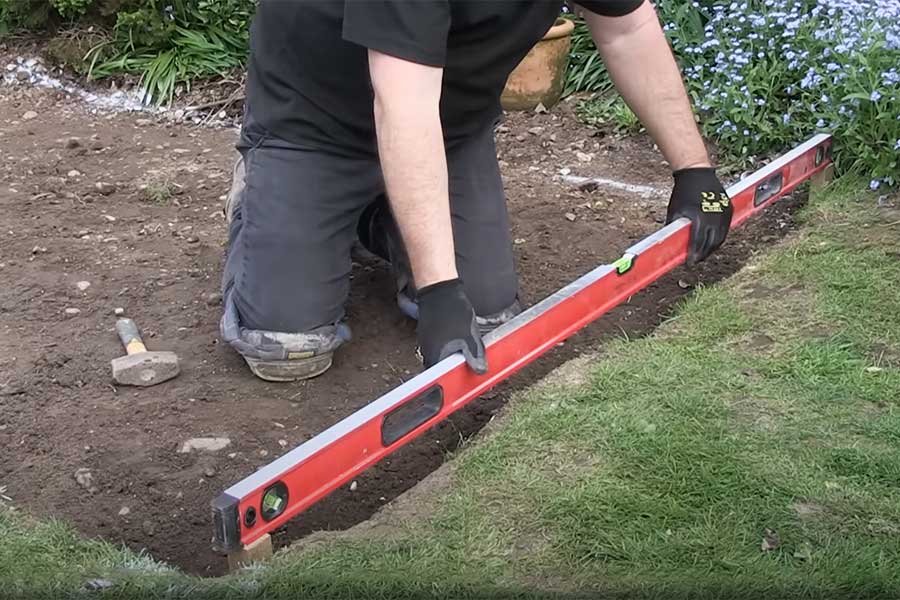
Image courtesy of Pavestone
To dig out the soil, we’d recommend hiring a mini excavator – unless your patio is very small. Other handy items include a skip for the debris and a cable detection machine to identify any buried pipes. When you hit the right depth (including the gradient at one end), rake the soil to even it out and remove clumps. Then dig your heel in to check its firmness. If it feels spongey, you’ll need to dig a little deeper until you reach sturdier earth. Next, use a wacker plate compact the soil and firm up any remaining soft spots with a sprinkling of sub-base aggregate.
Building the sub-base for your porcelain patio
To create a robust foundation for your slabs to rest on, the next stage involves adding an aggregate sub-base. This will help to prevent your patio moving or sinking over time. To begin, lay down a sheet of non-woven landscape fabricto cover the bare earth and aid stability. The membrane also acts as a barrier to reduce the chance of weeds growing through your paving.
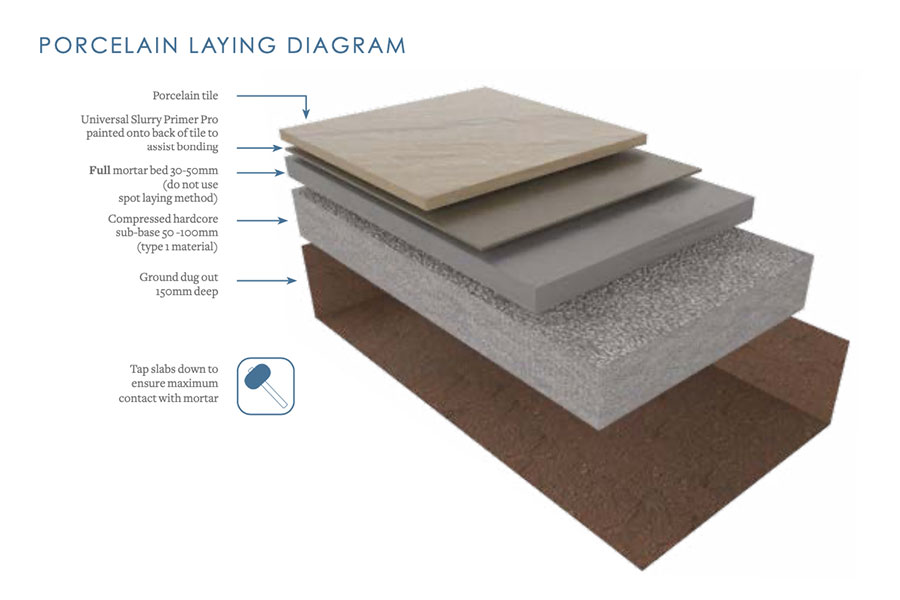
Image courtesy of Pavestone
When that’s done, place wooden pegs at each end of the patio – either tamped down to or marked at 100mm. Then tie string between the pegs to create a sloping line that will guide you when laying the sub-base. From there, it’s time to start adding the MOT Type 1 aggregate.
To start, distribute a 50mm thick layer over the soil using a wheelbarrow and rake to smooth. Then run your wacker plate over the surface several times to compress the stone, being sure to wear ear defenders. After a few runs, inspect the surface for any indentations and add some extra aggregate to level as needed. Then repeat the process for subsequent, adding and compacting the MOT Type 1 until it is levelled off at the 100mm mark.
Lastly, check that the surface is smooth and that the fall is still correct using a long-length spirit level. If you don’t have one, attach your spirit level to a flat wooden plank to cover a greater distance. Remember, the slope should be 60:1 – this is marked on many spirit levels for ease.
Making mortar for laying porcelain paving
With the patio base prepped, you can move onto mixing the mortar. Up until now, all of the steps covered have been the same as those for installing concrete and natural stone pavers. But here’s where things start to differ slightly. As porcelain isn’t as porous as other materials, it doesn’t adhere to mortar as well. As such, you’ll need a stronger mortar mix and a slurry primer (more on that later).
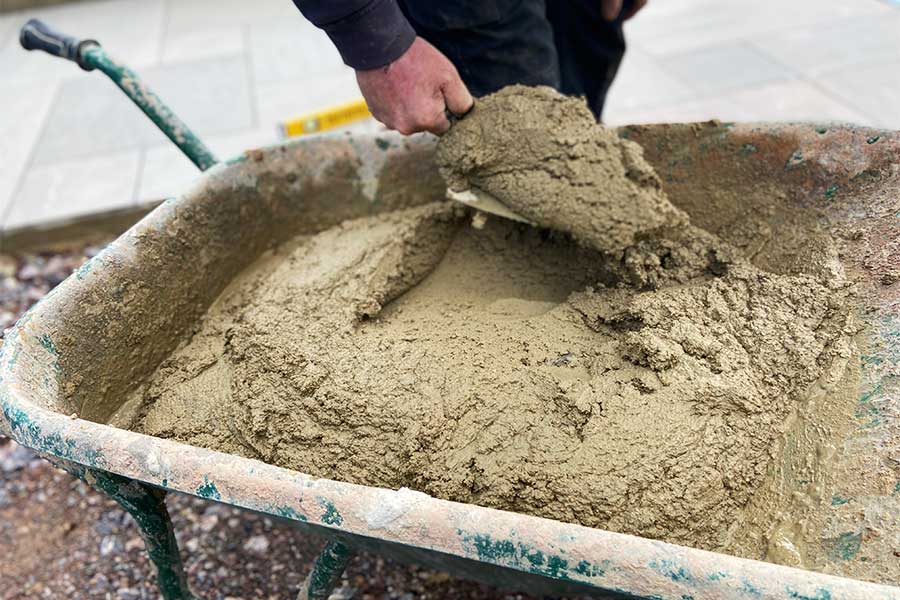
To make the mix, you’ll need to combine 4 parts mixed building sand and 1 part cement. To do this, add a little water into a cement mixer, followed by the first three 3 buckets of sand and all of the cement. Run the machine until combined, then add in the final bucket of sand and more water. Do this in stages, adding small amounts of water at a time and keeping an eye on the consistency. It’s also worth adding some latex-based SBR bonding agent to the mix to reinforce the cement – particularly in damp areas. Simply follow the instructions on the pack.
When you think it looks ready, stop the machine and grab a clump of the mix in your hand. It should be doughy and hold its shape, with no crumbling or oozing water when squeezed. If you’re happy, pour the mix out into a wheelbarrow ready for laying a bed for each slab. We should also point out that mortar must be used within around two hours of being mixed or it’ll dry out. Because of this, it’s best to make just enough for one row of paving slabs at a time.
How to lay porcelain slabs
Before we dive into the method for laying outdoor porcelain tiles, let’s circle back round to porcelain slurry primer. This is critical for securing your paving slabs to the mortar and sub-base, as porcelain absorbs very little moisture. Due to this, primer (which acts as a strong glue) is needed to aid adhesion to the mortar bed. The same also goes for granite and slate.
Now let’s get started on the steps involved in the laying process…
Creating the mortar bed
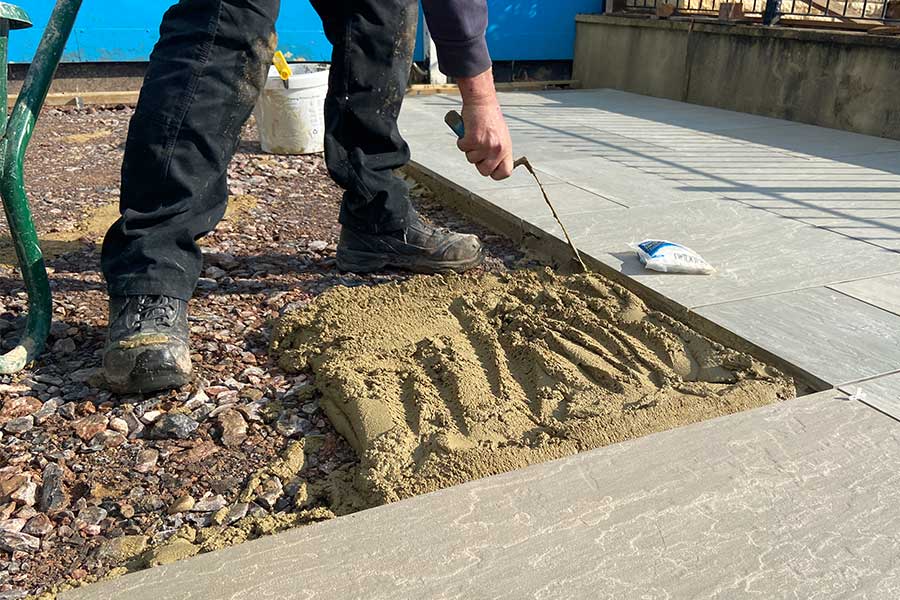
Starting in the top corner of your patio, apply enough pre-mixed mortar for one slab using a trowel. The finished mortar bed should be 40-50mm deep and you should roughen up the surface with the edge of the trowel. These ripples will allow space for compression when the slab is placed on top, filling any voids that could cause instability.
Applying slurry primer
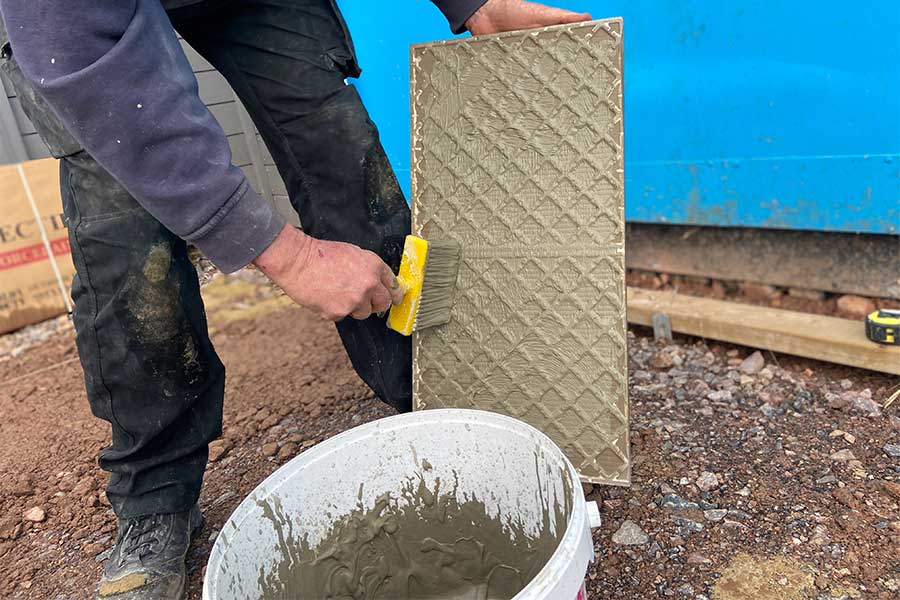
To prep your porcelain slab for laying, you’ll need to prime them with porcelain slurry primer. This typically comes as a powder that you add water to and combine using a paddle mixer. Just make sure you follow the directions on the packaging. Once ready, place your porcelain tile face down onto a couple of pieces of scrap wood to raise it off the ground. Next, paint an even layer of primer onto the back of the porcelain tile, right to the edge, using a thick brush.
Tip: wipe any splashes of primer off the slab’s face as quickly as you can with a wet sponge. If left to dry, the primer will be impossible to remove, so keep a bucket on hand just in case.
Laying the slabs
Now it’s finally time to cover the key stage of this guide – how to lay porcelain slabs. And after all that preparation, this is arguably the most straightforward part! Simply take your primed porcelain paver and place it onto the mortar bed, starting from a straight edge. Once in position, gently tamp the slab down using a rubber mallet to help fix it in place. This will also eliminate any gaps that could lead to movement once dry.
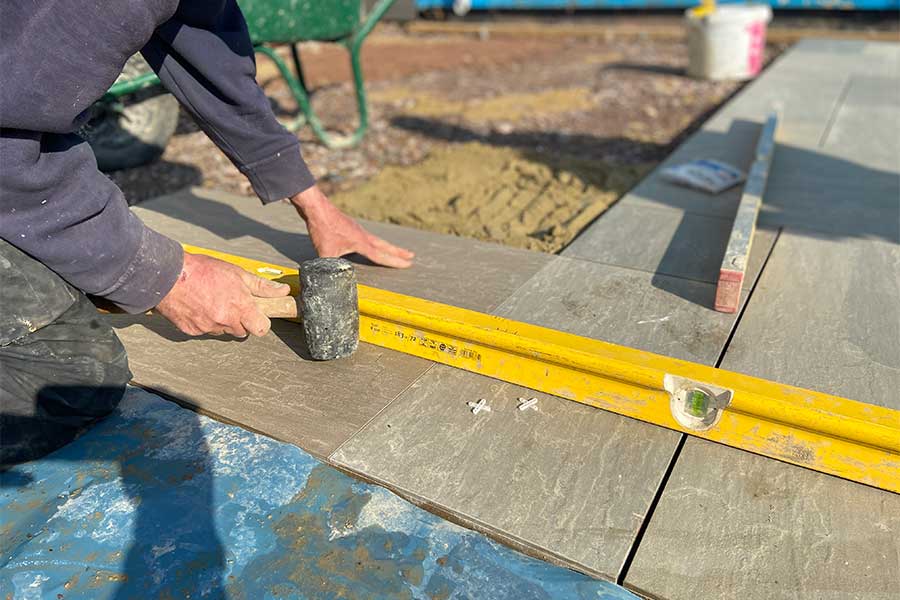
You can then check the slab is square to the perimeter string line and that the slabs are level with the correct fall. You’ll also need to make sure there are no lips that could serve as trip hazards. Take your time with this first paver, as getting it wrong will throw off the entire patio.
When you’re happy, repeat the process, working in rows and leaving a 5mm gap between each slab. To ensure the joints are all even widths, just add joint spacers. Remember that pavers should never butt up to each other as this can lead to damage. Instead, the joints will be filled with grout later to prevent dirt and weeds from building up in the gaps.
You should also check the position of each slab as you work – you won’t be able to make changes after the mortar has dried. Likewise, it’s good practice to wipe down the surface of each slab with a damp sponge once laid. This should help to prevent any primer or mortar residue setting on the surface and ruining the patio’s finished look.
When you’re done, leave the paving to set for at least 24 hours before walking on it. And if rain is in the forecast, protect your newly laid slabs with tarpaulin to keep the mortar dry.
A note on cutting porcelain pavers…
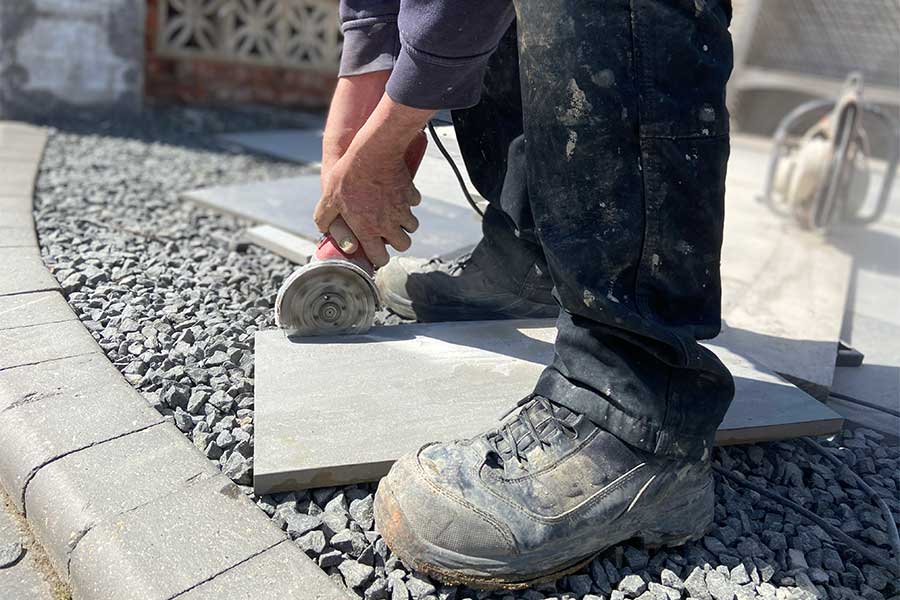
As not all patios are square, you may need to cut your outdoor porcelain tiles to get the right fit. Or you may need to make cut outs to allow for fixed objects such as drainpipes, planters or steps. Whatever the scenario, don’t panic! While cutting porcelain slabs is harder than cutting softer stone slabs, it shouldn’t be an issue provided you have the right tools.
For porcelain, you’ll need to get your hands on a smooth diamond disc cutter blade. You can use this with either a water cooled table saw or a petrol-powered wet saw – either will work. For guidance on the best method to use, watch Pavestone’s handy porcelain cutting video.
Grouting your porcelain patio
When it comes to grouting porcelain paving slabs, you’ll need an epoxy based product to ensure good adhesion to the slabs. Broadly, there are three types of grouts for porcelain paving: pre-mixed brush-in grouts, slurry grouts, and cement-free epoxy grouts.
Premixed brush-in grouts for porcelain paving
Premixed brush-in grouts, such as Joint-It Simple and TuffJoint Utility by Steintec, are the easiest to use and are aimed at DIYers and professionals. They are simple to use but are perhaps not quite as durable as slurry and cement free epoxy grouts. To apply these premixed products, you simply brush the paving to remove dirt and debris, hose down the paving to wet the surface and joints, pour the jointing compound over the patio and brush well into the joints before finally sweeping away any excess jointing compound. In a few hours the jointing compound will dry, and the patio can be used. Watch the video below to see that application process for brush-in porcelain grouts.
Slurry grouts for porcelain paving
Slurry porcelain grouts require a little more time and effort to apply but are more durable and will provide the best results. Azpects EasyGrout is a high-quality slurry grout developed for professionals, but it is also suitable for DIY use. Available in 3 colours, it is supplied in a powdered format which is mixed with water to make a highly flowable liquid slurry. The benefit of the liquid format is that the grout flows easily deep into the joints, creating a strong seal. Once mixed, it is simply poured into the joints, spread with a squeegee and the residue is cleaned of the surface of the slabs with water and a sponge. After allowing the grout to dry for 1 – 2 hours, any remaining residue is cleaned from the surface of the slabs with Azpects Grout Residue Cleaner and a sponge. The complete process for applying slurry grouts can be viewed in the video below.
Cement free epoxy porcelain paving grouts
The Joint-It Porcelain Epoxy Grout is a cement free alternative to epoxy slurry grouts. Supplied premixed in tubes, it is applied directly into the paving joints with an application gun. Prior to applying the grout, Joint-It Anti-Bonding Wax is applied to the slab surface along the joints to prevent the grout from sticking the surface, this also makes removing the residue easier. The grout is applied with an applicator gun, rather like mastic, and smoothed with Joint-It’s grout tools. Once dry, the residue is removed from the surface of the slabs with a scraper. Both manual application guns and a fully electric kit, aimed at professional installers is available. The benefit of the Joint-It Porcelain Epoxy Grout is that, as it is not cement based, a very smooth finish can be achieved. This video shows the full application process in detail.
Whichever method you choose for pointing and grouting porcelain paving, it is important to choose a product that is compatible with porcelain paving from a quality manufacturer, and the application and cleaning instructions are carefully followed. For help and advice regarding porcelain paving grouts, please do speak to the staff at your local AWBS branch or contact the grout manufacturer directly.
Get everything you need for laying porcelain paving at AWBS
From aggregates and cement to jointing compound and a wide range of porcelain paving slabs, look no further than AWBS. We stock a variety of leading brands like Digby, Pavestone and Bradstone, plus a selection of affordable own-brand porcelain pavers. Styles include authentic stone and wood effect finishes to complement your preferred aesthetic.
In addition, we deliver free of charge within 25 miles of Oxford, Swindon and Yarnton, with no minimum order value. So what are you waiting for? Browse our full range online or visit us in branch – we can’t wait to welcome you!